
DIY Console Table
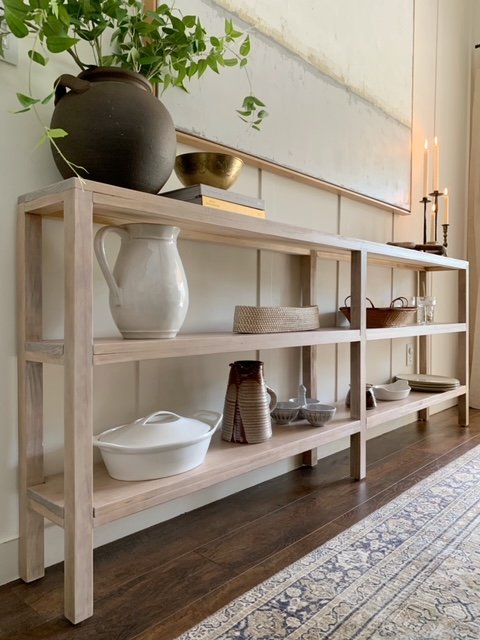
I have this thing where if I’m going to build something myself, it really bothers me if it looks like I built it myself. Like the biggest compliment I can get after a DIY is “Where did you buy that?” Makes my day!! I have done some projects in the past where I can tell it was a handmade piece and they always bother me. So when I decided to make this console table, and I had it in my head that this WOULD NOT look like handmade crap, and I was determined! I talked it all over with Dan because he is so skilled at carpentry and always gives me the best advice. He helped me with figuring out the measurements, and then I did this by myself!!! And I’m pretty damn proud of it. And why am I telling you this? Because with the right tools, you can build this too. And I can be your “Dan” to help guide you along the way!
Keep in mind I have a story highlight on my Instagram page that shows most of these steps so If you’re a visual learner, you may want to watch that as well.
First step is to go buy your wood. I ended up using pine because it was SO MUCH less money than the harder woods like oak. In all, the lumber cost me a under $250. The table I used as my inspiration was a little over $1000, a foot shorter in length, and not solid hardwood, so I think that’s a great savings!

* My table ended up being 83 13/16 long bc a piece of wood was cut at a slight angle at the factory so I had to trim a little off after I already made my cut. But I was going for 84” aka 7 feet. Also, take the time to check each piece of lumber to see if its straight or warped. Warped wood = crooked table.

You can see how this piece of wood is warped at the end. It makes it easier to check when you hold it at eye level.
Here is what lumber you will need:
3 pieces of 1” x10” x8’ select pine boards 9 (actual 3/4” x 9 1/4”)
12 pieces of 1x2x6’ select pine boards *(my store didn’t have 8’ of these but that would’ve been better)
6 pieces of 2x2x6 select pine for the legs
Other materials:
Kreg screws at 1 1/4” length
pre- stain wood conditioner
stain
clear topcoat
white paint/water
rags for staining
nail gun and brad nails (or if you don’t have this you can use super skinny regular nails)
jigsaw
miter saw
150 grit sandpaper
220 grit sandpaper
wood glue
clamps
To get started, I brought the boards inside to get an idea of how long I wanted the table to be. I stacked them on top of boxes to see about the height as well. This was really helpful in planning this.

Once I decided, I sketched out my table on paper.
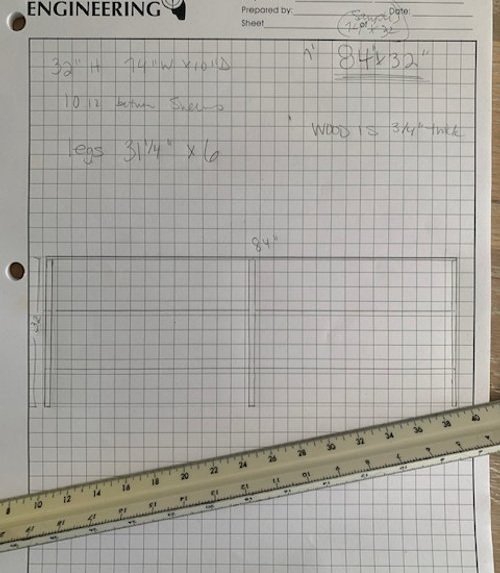
Then I cut the long boards that would be my three shelves to 83 13/16”. Next step is to cut your table legs to length. I wanted my table to be 32” tall so I cut each leg to 31 1/4” to account for the shelf and support wood width. Then we took the scrap pieces from the legs and placed them on the underside of the tabletop. We measured between each leg to see what length the support 1x2’s would need to be. The distance on the long sides was 39 3/4” between each leg. The distance on the short end sides was 6 1/4”.
So for my exact table you would end up with:
3 of the 10” shelf boards measuring 83 13/16” long
6 of the 2x2 leg boards measuring 31 1/4” long
12 of the 1x2 supports measuring 39 3/4” long
6 of the 1x2 supports measuring 6 1/4” long
Now that you’ve got all of your wood cut on the saw, you will drill a pocket hole into each support piece on both ends.

This is how you’ll attach the supports to the legs. To attach the supports to the legs, you’ll use the drill attachment from the Kreg jig and use the Kreg screws as well. I used a clamp on my work surface to hold each piece in place as I drilled them in. As for the spacing, I measured 12” down from the top of the leg and attached my shelf support there. (See sketch) Then for the second support, I measured from that mark down another 12”.
You’re going to build one side at a time and then use the smaller side support pieces to attach those two sides together to make your frame. Fitting my drill bit in that small space was difficult so I used a ratchet to tighten the screws up.

Once the frame was built, I took my sander with a 150 grit and sanded all of the edges except the top of the supports (so the shelves would still sit flush). I think when you round out the sharp edges on furniture it helps it to look a lot more professional. You can also do this by hand. I also used an 80 grit to knock down any spots that seemed uneven where I didn’t drill in the 100% right spot.
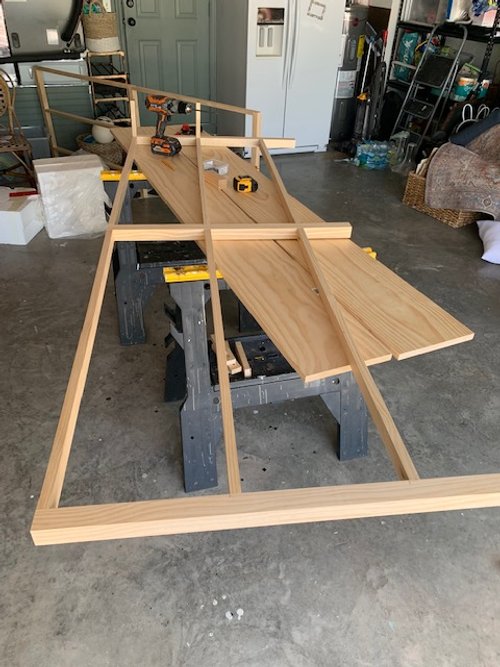
Now its the fun part!! Time to attach your shelves! The two lower shelves will need to have cutouts where the table legs will go. To do this, I set the boards by the console frame on the ground. Then I used table leg scraps to trace out where each leg will need to be cut to fit.
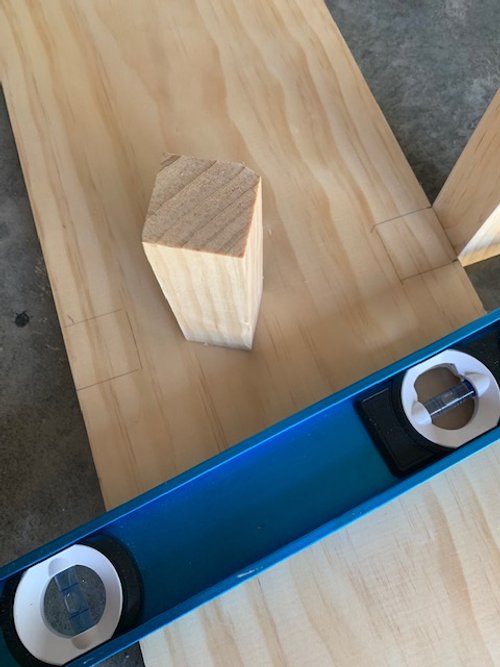
You can see here how I traced the legs on the shelf.
Using the jigsaw, cut the wood out and try to stay as close to the lines as possible as these joints will show. Sand any rough edges. To fit the shelf, insert it an an angle and they turn into place. If it fits, you’re good! If not, you can tweak your cutouts as needed.


Once your shelves fit, you are going to apply wood glue to the shelf supports and place your shelf on top.

Use clamps to hold everything flush and let dry according to your glue instructions. I started with the bottom shelf and went up. I also tacked each shelf on with some brad nails to make sure they were secure. You could try to do this from the bottom up so you have no nail holes to fill but my nailgun was too bulky and made it difficult to do this well.

Once the top shelf is attached you’re table build is done! Sand anything that seems like it needs a little tweak and if you like, you can give a light sand with a 220 grit to your entire piece.
Clean off your wood and apply a pre stain wood conditioner to everything. If you followed this project on instagram, you know the stain was a real B. Ha! Pine is notorious for being a paint to stain but here is what I did and it turned out to be so pretty!! I used 2 coats of Minwax Weathered Oak and then an additional quick layer of Varathane Special Walnut. The color was ok but a bit “off”.
I then mixed maybe a 4:1 or 3:1 ratio (I didn’t measure I’m sorry!) of water to off white paint I had on hand to make a whitewash. I used a rag to apply a thin layer in small sections and then immediately wiped it off with a dry rag before it could dry. I ended up doing two coats of the whitewash. IT LOOKS SO BEAUTIFUL!! The color is actually really close to my oak dining table which makes me very happy!
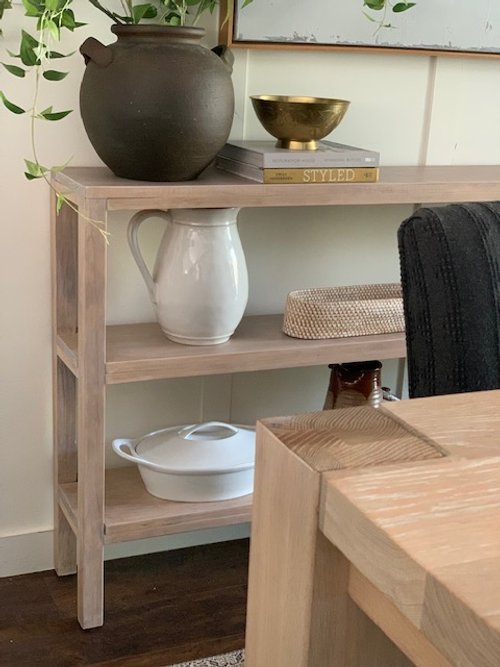
To finish it up, I applied this matte topcoat. It’s water based so it doesn’t change your wood color. After all of that stain drama, believe me, this is essential! Ha!
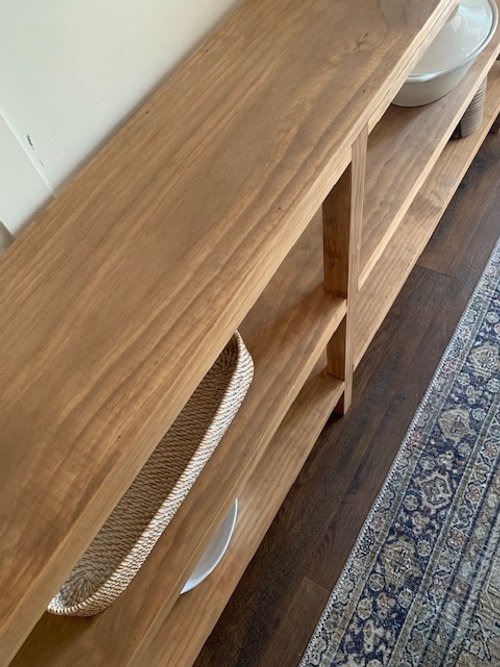
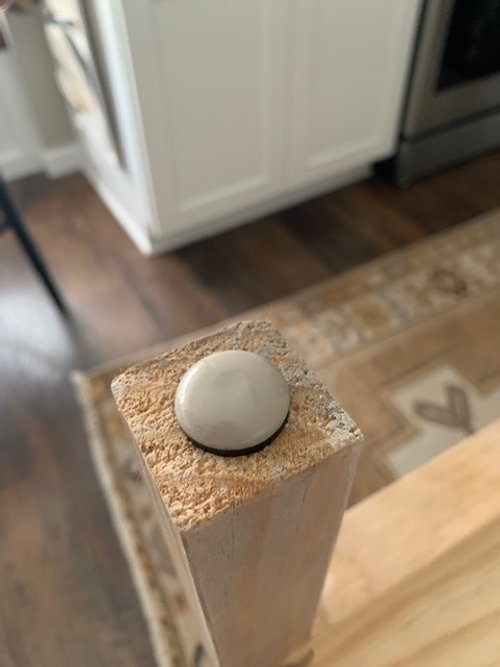
I also added these nail in furniture leg slides so the table will move across the floor easily.
To fill the little nailholes I used this wax blend stick in the lightest color and it worked so well.

Nail hole before the wax

After! Can’t see it!
That’s it!! Whew! Please let me know if I forgot anything as I know this was a long post with lots of steps! If you build one, please send me a pic so I can see! You can share it here or over to my Instagram @hartley_home. Thanks!