
DIY Peg-rail with Art and Decor Shelf
In 2020, while quarantined and staring at my home for way too many hours, I updated my bedroom. Part of that included beadboard and trim behind the bed and a peg rail on one wall. I LOVE the beadboard wall… but the pegrail always felt a little “off” to me. Here’s a photo of that reveal. Pretty. But two years later, I wanted MORE!! haah
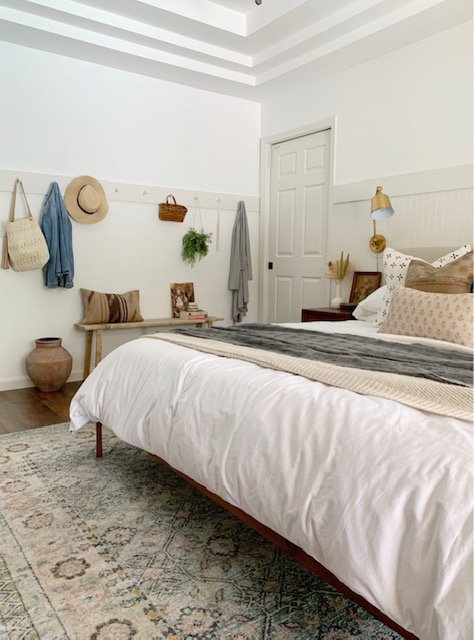
So I “fixed” it! Earlier this week I added a shelf to the peg rail and now it looks so much better to me! A lot of people asked for a tutorial for both the peg rail and the shelf. I aim to please, so I dug into my photo archives for the pegrail portion and made it happen!

I’d show you a pulled out image here to match the before, but I’m now on the hunt for a bench you can actually sit on for here since the one I made is terrible. haha I’ll update this post as soon as I get my new bench.
Pegrail and Shelf Tutorial
Materials:
1x6 boards (cut to the length of your wall)
shaker pegs
drill
countersink drill bit
wood screws
wood glue
Figure out the spacing for your pegs and mark it on your board. If you’re like Dan you will do crazy math formulas to figure this out. If you’re a DIY free spirit like me, you will eyeball it and call it good. Just make sure they’re centered. ;) I used a square to make sure I was doing this right.

Next you’ll use a drill bit that’s the same size as your peg and drill into your marks. Try to keep your drill as straight as possible so you’re not making angled holes.

Use wood glue and a rubber mallet to secure the pegs into place.

To attach this to the wall, I used a stud finder and drilled through the board into the studs when possible. I also used a countersink drill bit to sink the screw heads a bit. That way when you wood fill and paint the screws disappear. Sorcery.
Now you’re ready for the shelf. I attached my board from the top down with my nail gun first just to hold it in place since I was doing this project alone. Then I drilled down into the other board that’s on the wall to secure them together. I used my countersink drill bit again for this step.

Wood fill, caulk, sand, and paint it all! I used a custom color I made in 2020 that we (the instagram community) named Quarancream. Here’s that paint and formula if you’d like to try it too.

Be warned: this paint is not cheap right now. I bought a quart for the shelf addition and it was $40! But it is a good paint…

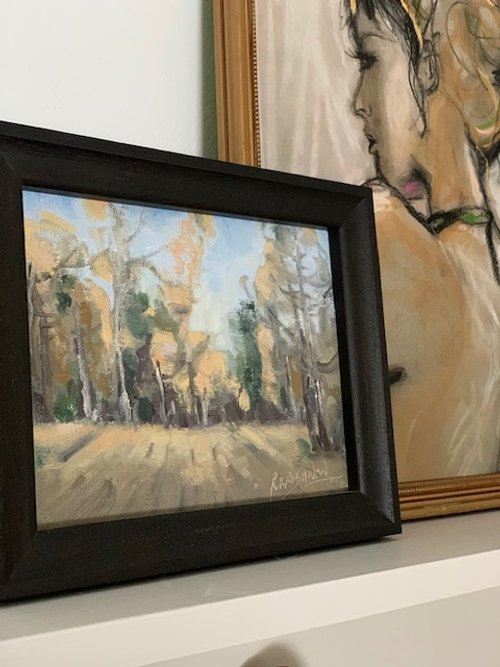
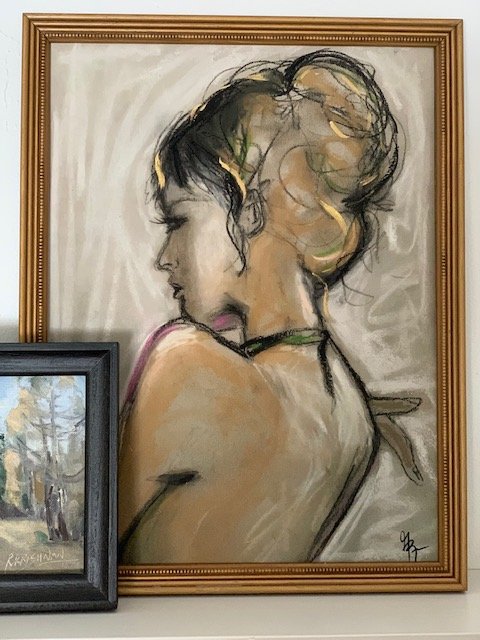
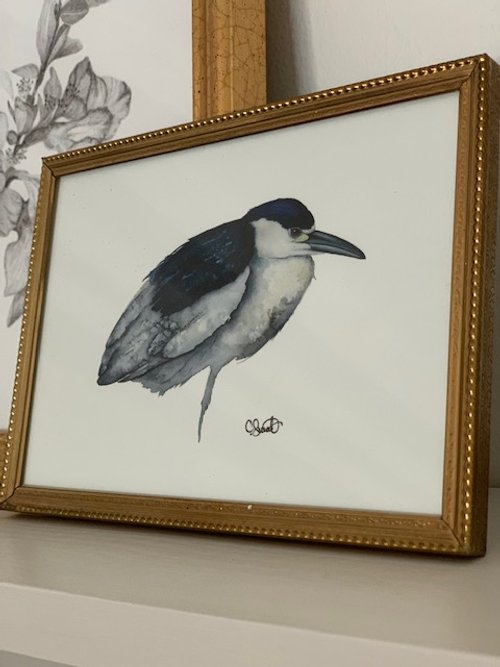
Style it and you’re done! Most of this beautiful art is by talented friends I’ve met through instagram. I’ll link each of their shops here! Click to shop!

I’ll be back with a beautiful after photo with my perfect new bench one of these days. Wish me luck on my hunt!
xo Kelly