DIY Wood Fire Pit Cover
I’m so excited about this project! I love when something is functional but also adds beauty to your home! This cover does just that.
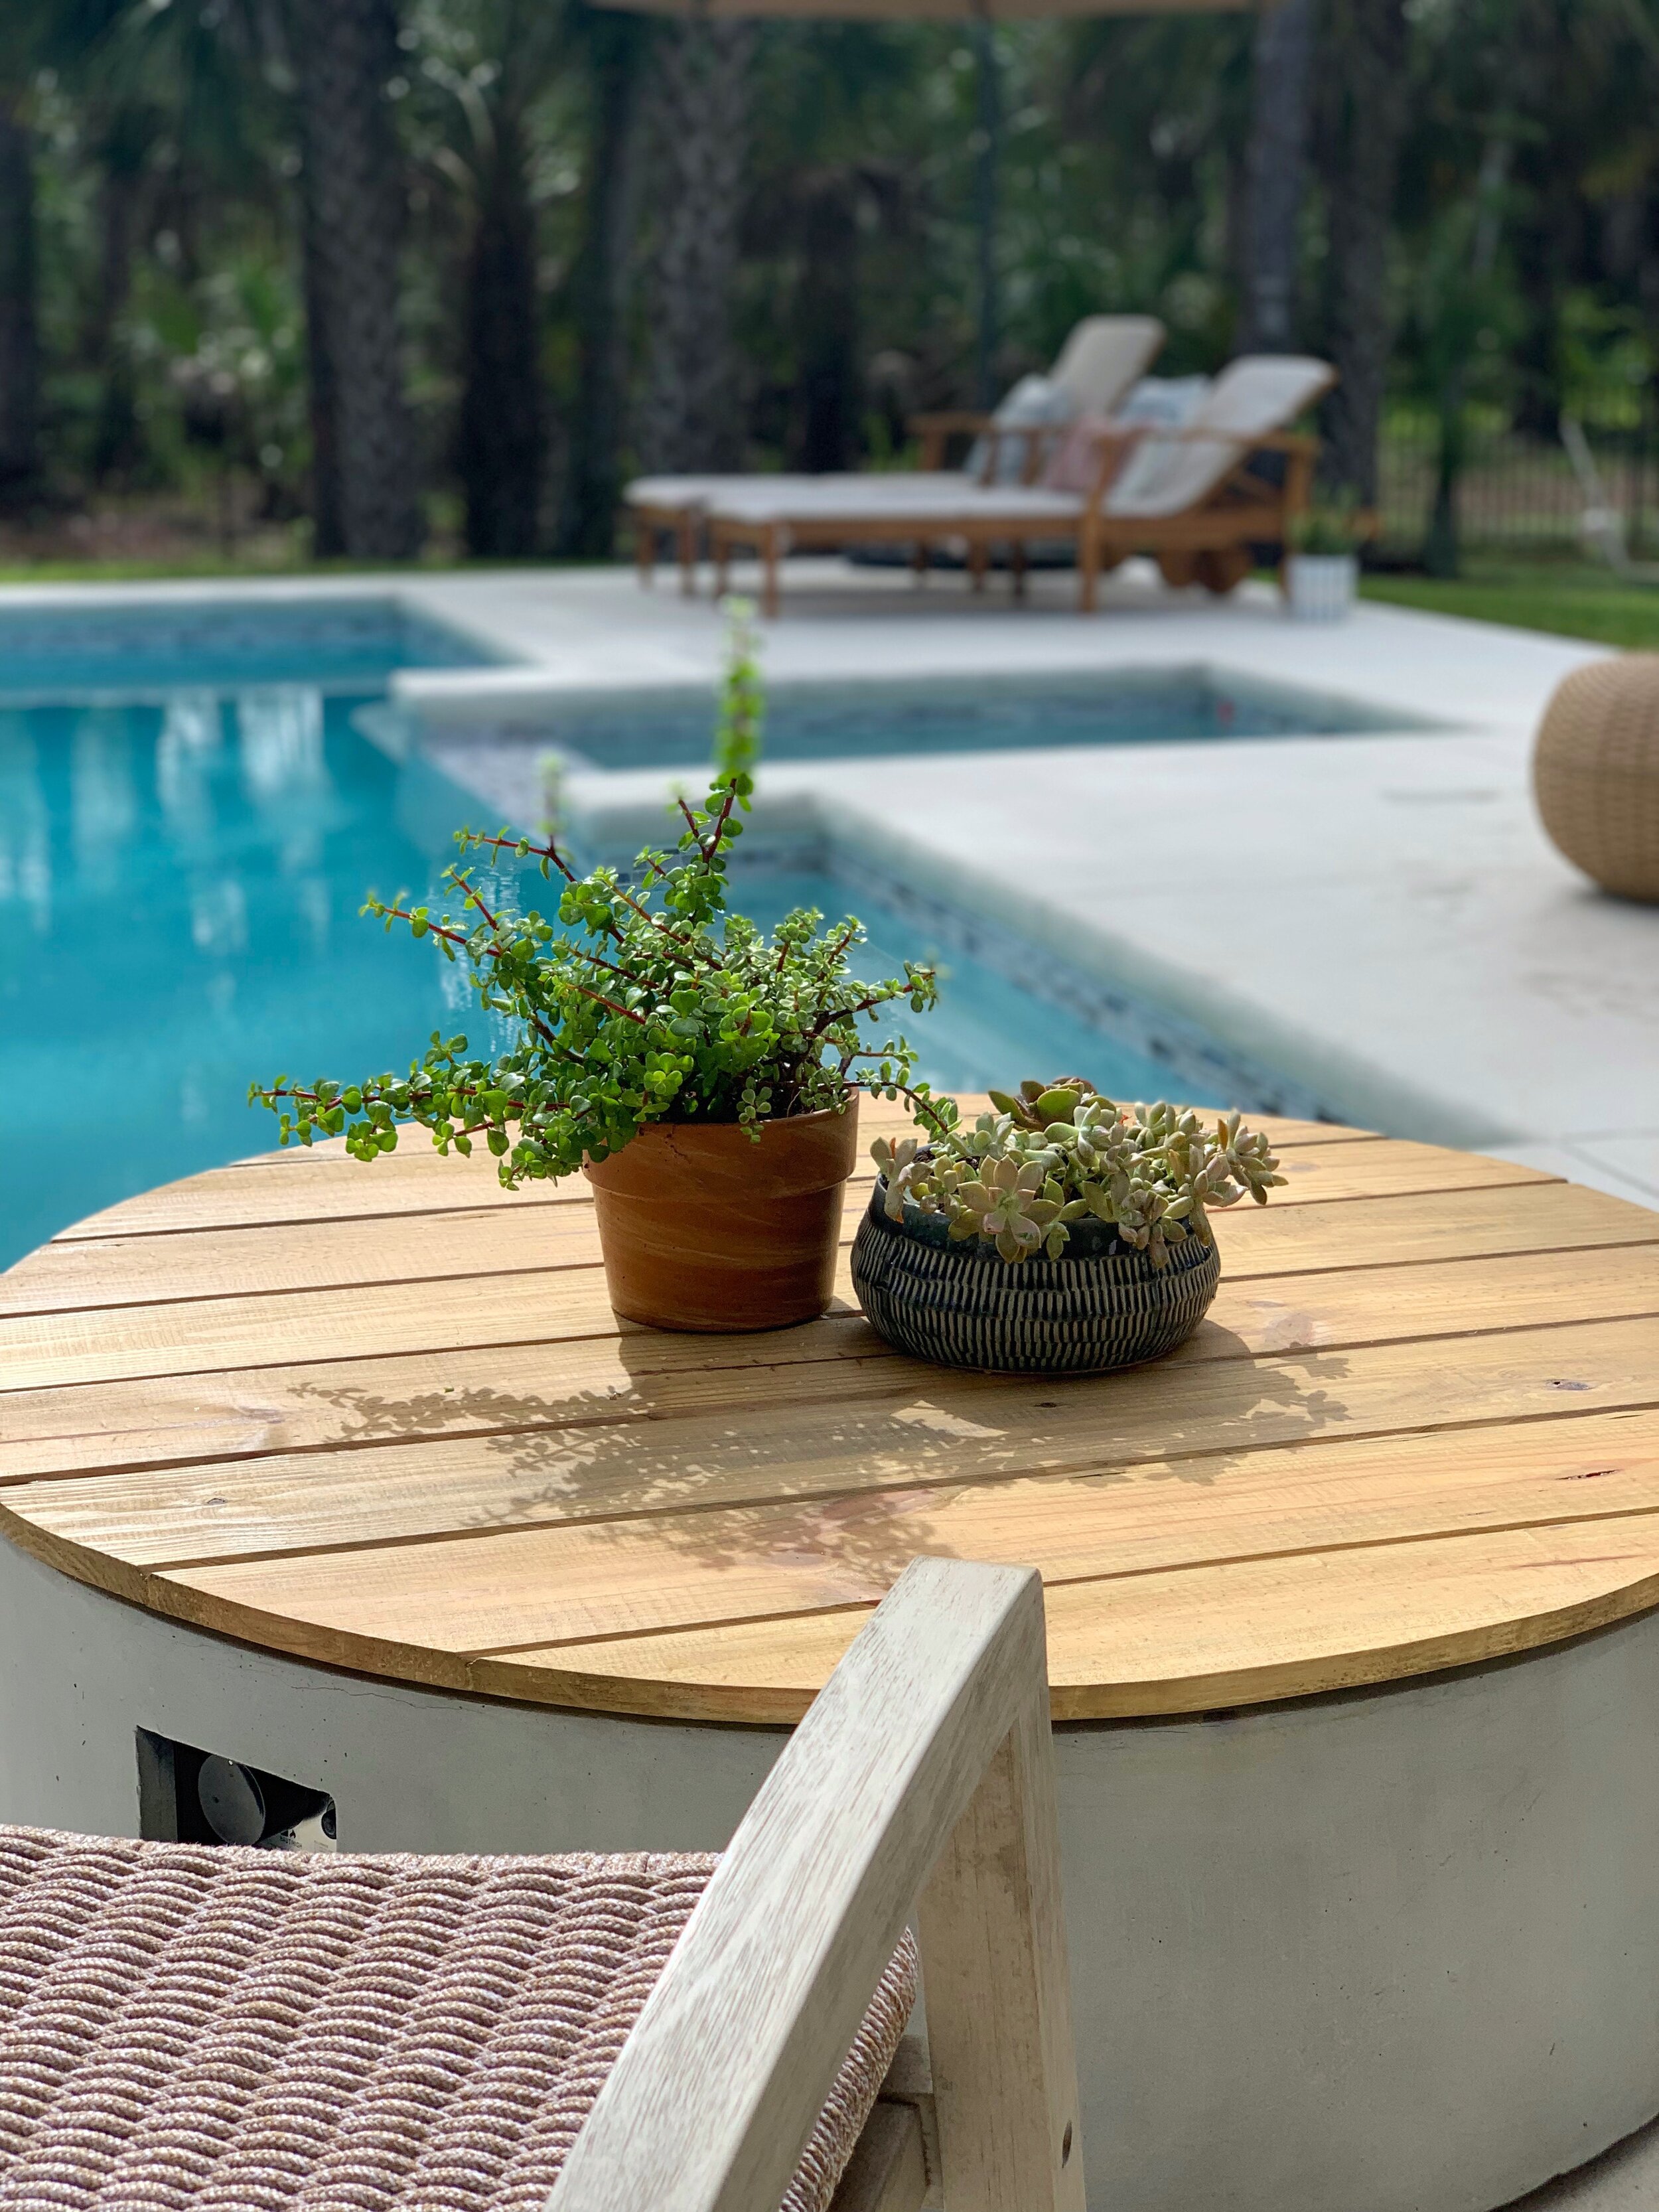
We live where it rains. A lot. And the fire pit has a metal ring inside that will rust. It’s not a great combo. But this cover keeps everything dry and also turns our fire pit into a cute outdoor coffee table. Its such a win!


Here’s what you need:
1x6 pressure treated pine (We needed four, 8’ pieces for our 43” fire pit)
clamp
exterior deck stain/sealant (We had our semi-transparent stain tinted to Madrone. There should be a booklet at Home Depot where you can see the colors. )
auto and marine rubber weatherseal
metal braces we got 4
sheet metal screws #12 x 3/4
Step 1: Dan and I wanted the wood to have a subtle beveled edge where the pieces meet. This step isn’t necessary to construction, but it will make it look prettier. To do this, we ran each piece of wood through the table saw with the blade set at 45 degrees. You’ll need to adjust your guide to see how much wood you want to shave off.

That just gives it a slight edge and will make the wood joints look more pronounced for your table top. Then we cut the wood in half to make 4’ pieces vs 8’.

Step 2: Arrange your pieces of wood so they lay nicely together. Pay attention to the pattern/grain as well as which pieces fit nicely together as wood can be a bit warped. Using a tape measure, sketch out your circle size onto the wood. It doesn’t have to be perfect at this point but just a general idea. You need this so you know where you put your pocket screws.
Step 3: Using a clamp and your Kreg jig, make pocket holes about every 6” so the wood will be securely fastened. All of the pockets will be drilled the same direction except when you get to your last piece. you always want to drill into the end piece so that will mean changing the direction.

Step 4: Take your wood out to your fire pit and lay it on top. Use your pit as a guide and trace the top of your pit onto the wood. Use a jigsaw to carefully cut out your circle. I went a little outside the line to be sure I didn’t make it too small. Sand the edges until smooth.

Step 5: (*Pressure treated wood needs to be dry before it can be stained. If when you were drilling, liquid came out, its still too wet. Once it’s dry, you can do this step.) Apply a deck stain and sealant to the wood. Pressure treated lumbar is made to be weather resistant, but it looks a bit green as a result. Adding the stain offers more protection and also makes the wood look beautiful. The stain I used is listed in the materials above and I applied two coats.

Step 6: Use clear exterior caulk to fill in the gaps between the pieces of wood. This will help make sure no water gets through onto your fire pit. Don’t worry- this caulk goes on white and dries clear. I added some to the underside seams as well because… why not?

Step 7: Next, I added the weatherseal to the rim so it would create a waterproof seal underneath and offer some cushion. The only thing that wasn’t 100% making me happy was the fact that the cover was able to bend a bit at the joints when we picked it up. With pocket screws, that’s not a huge surprise, but I wanted to find a way to make it more sturdy. To do that, I added metal braces along the length. We did need to use metal snippers to make the end pieces shorter. I attached them with the #12 screws.

That’s it! That’s how we made this beautiful fire pit cover. However, I want to mention that there are a couple different ways you could make a cover. It will depend on the style of your fire pit and what tools you have available.
You could also use double the wood and have two layers screwed together. The bottom layer would be in the opposite direction as the top. It would be heavier, but it wouldn’t bow and you wouldn’t need any metal braces or pocket screws. Here’s an example of what that looks like found via Etsy.
Another way, and this would be for a deeper wood burning fire pit, would be to attach the wood with some shorter pieces of perpendicular wood. You’d also need to add some smaller metal braces to the edges like this example.
I was thinking…now that I was a pal and told you some other methods… even if you end up tweaking this design… and use one of the other examples I gave as your construction method… I still get the credit right? Haha! ;)
No go make yourself a fire pit cover so you can have an outdoor coffee table/ rain protector too! And if you do, please share with me because I love to see your projects! Enjoy!